
There is a saying, it’s better to be someones shot of whisky, than everyone’s cup of tea.
I first bought my KTM 690 Duke in September 2016 after putting 500 miles on a work’s demo bike and completely falling in love with it.
Why? It was light in weight, had a beautiful TFT dash and at its heart was a wonderfully, stroppy single cylinder engine.
I’d been eyeing up this bike in the showroom for a while. I liked it, in fact I loved it. When I took out the demo bike, I loved how it rode and how it made me feel like a faster, better, more competent rider. The one thing I couldn’t stop thinking about was how I was going to buy it and change it visually to make it different to any other KTM 690 Duke on the market.
Working at a KTM dealer at the time, and having KTM’s bike configurator open on the computer in front of me most days – curiosity got the better of me and I started scrolling through the masses of accessories at my disposal.
Here the first picture I had taken of me with my new machine.
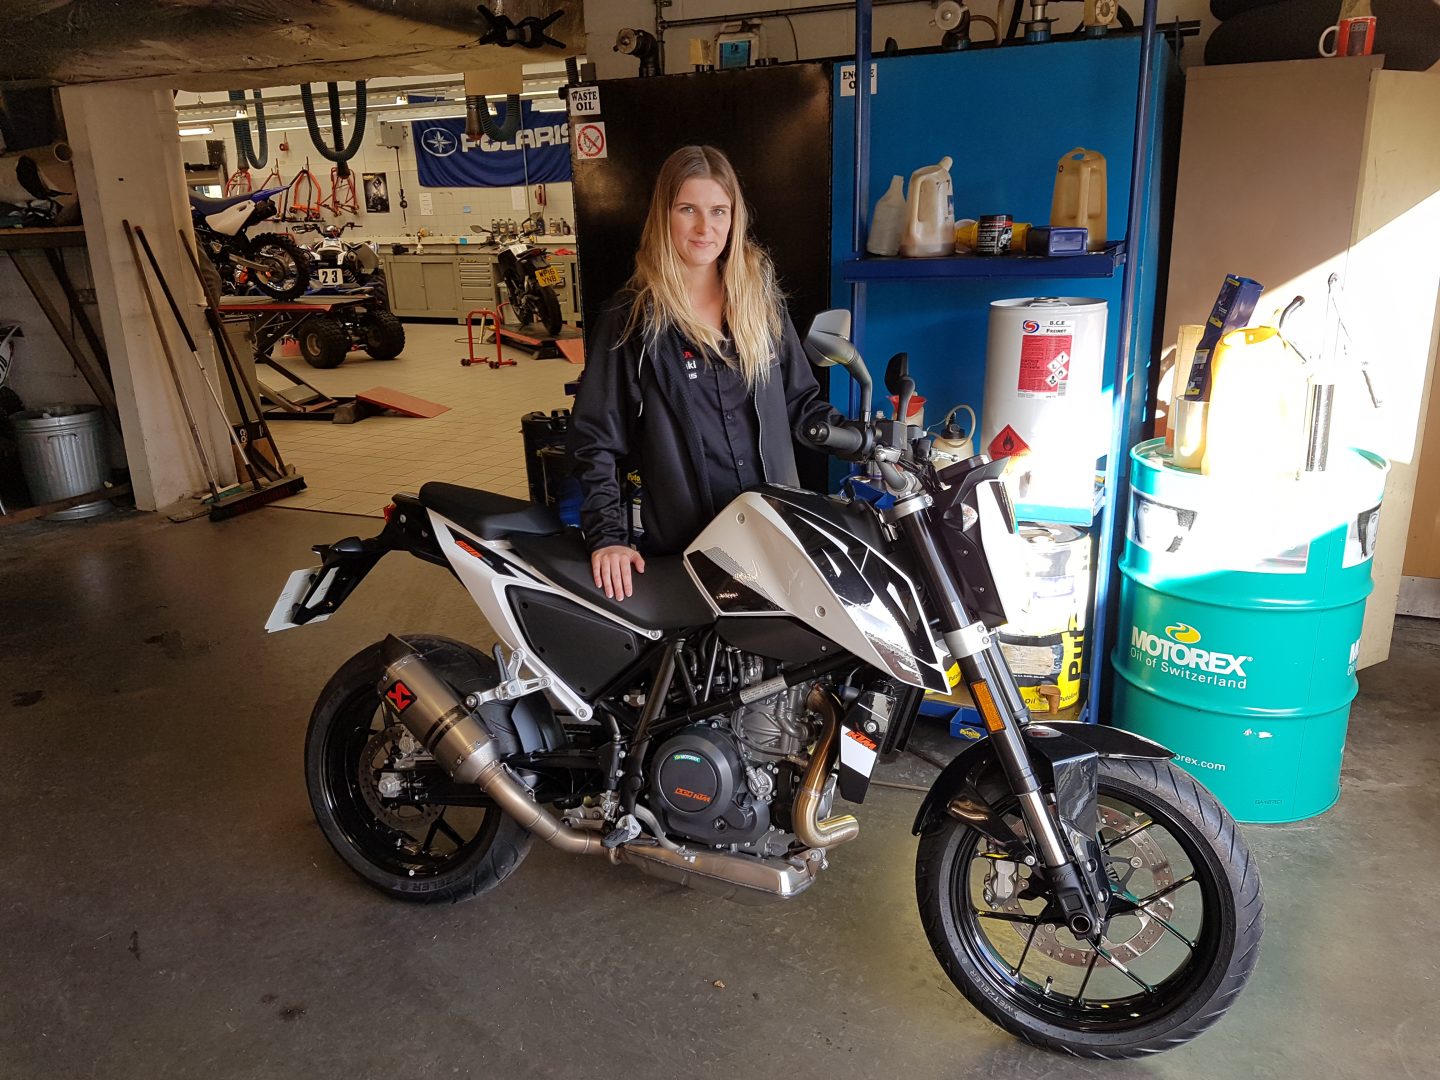
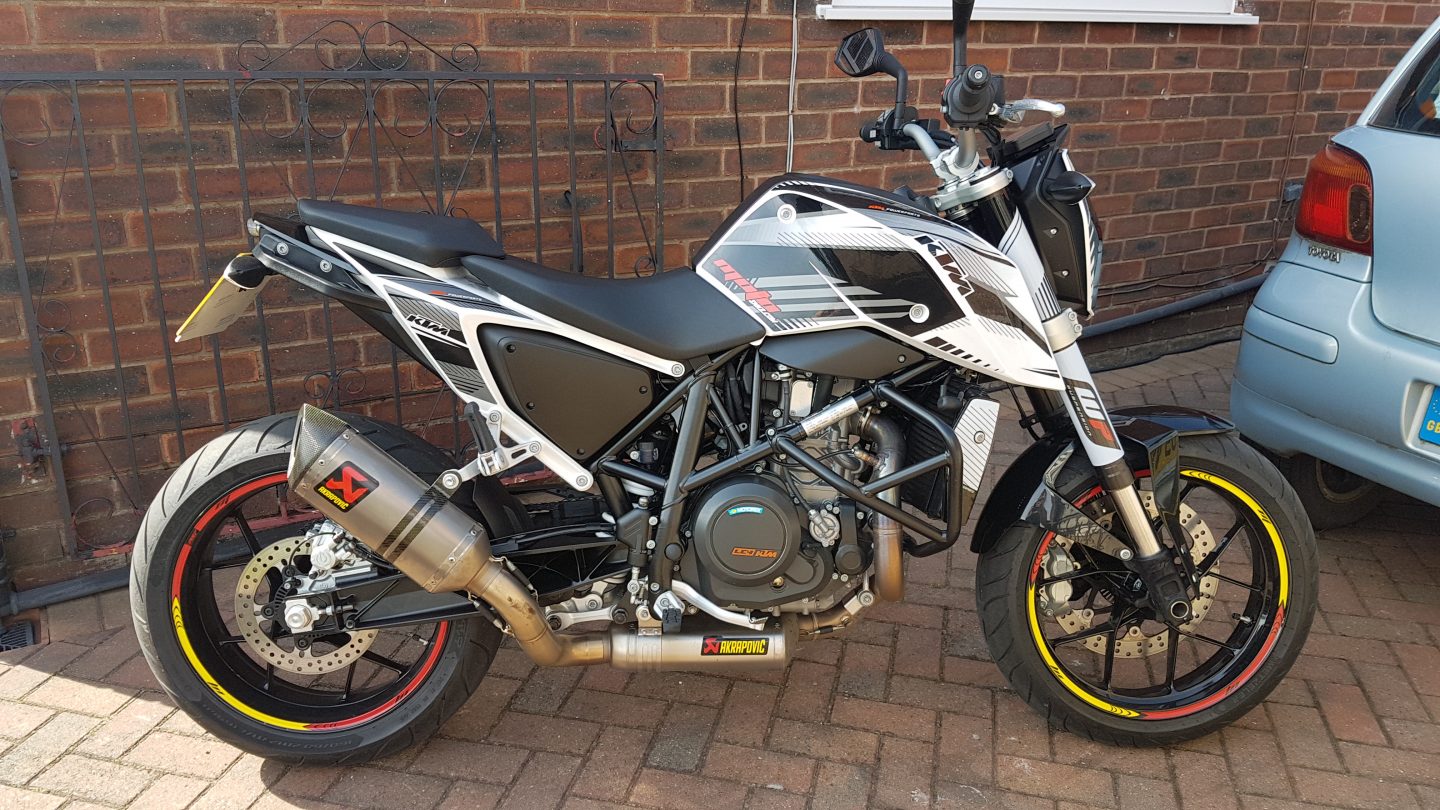
At this stage, I had got an Akrapovic End Can put on and that was the only thing that had been changed. So it was still pretty standard at this stage.
I still had massive plans for the bike. I was happy with the end can. It looked much meaner than the boring silver stock can and is supposed to add 3 bhp which wasn’t really noticeable to me from riding the standard version days before, however I had a much bigger smile on my face when riding through tunnels. The engine note was a lot deeper, had a more refined rumble to it, and of course there wasn’t a baffle in sight.
Next on my list was a:
Tail tidy
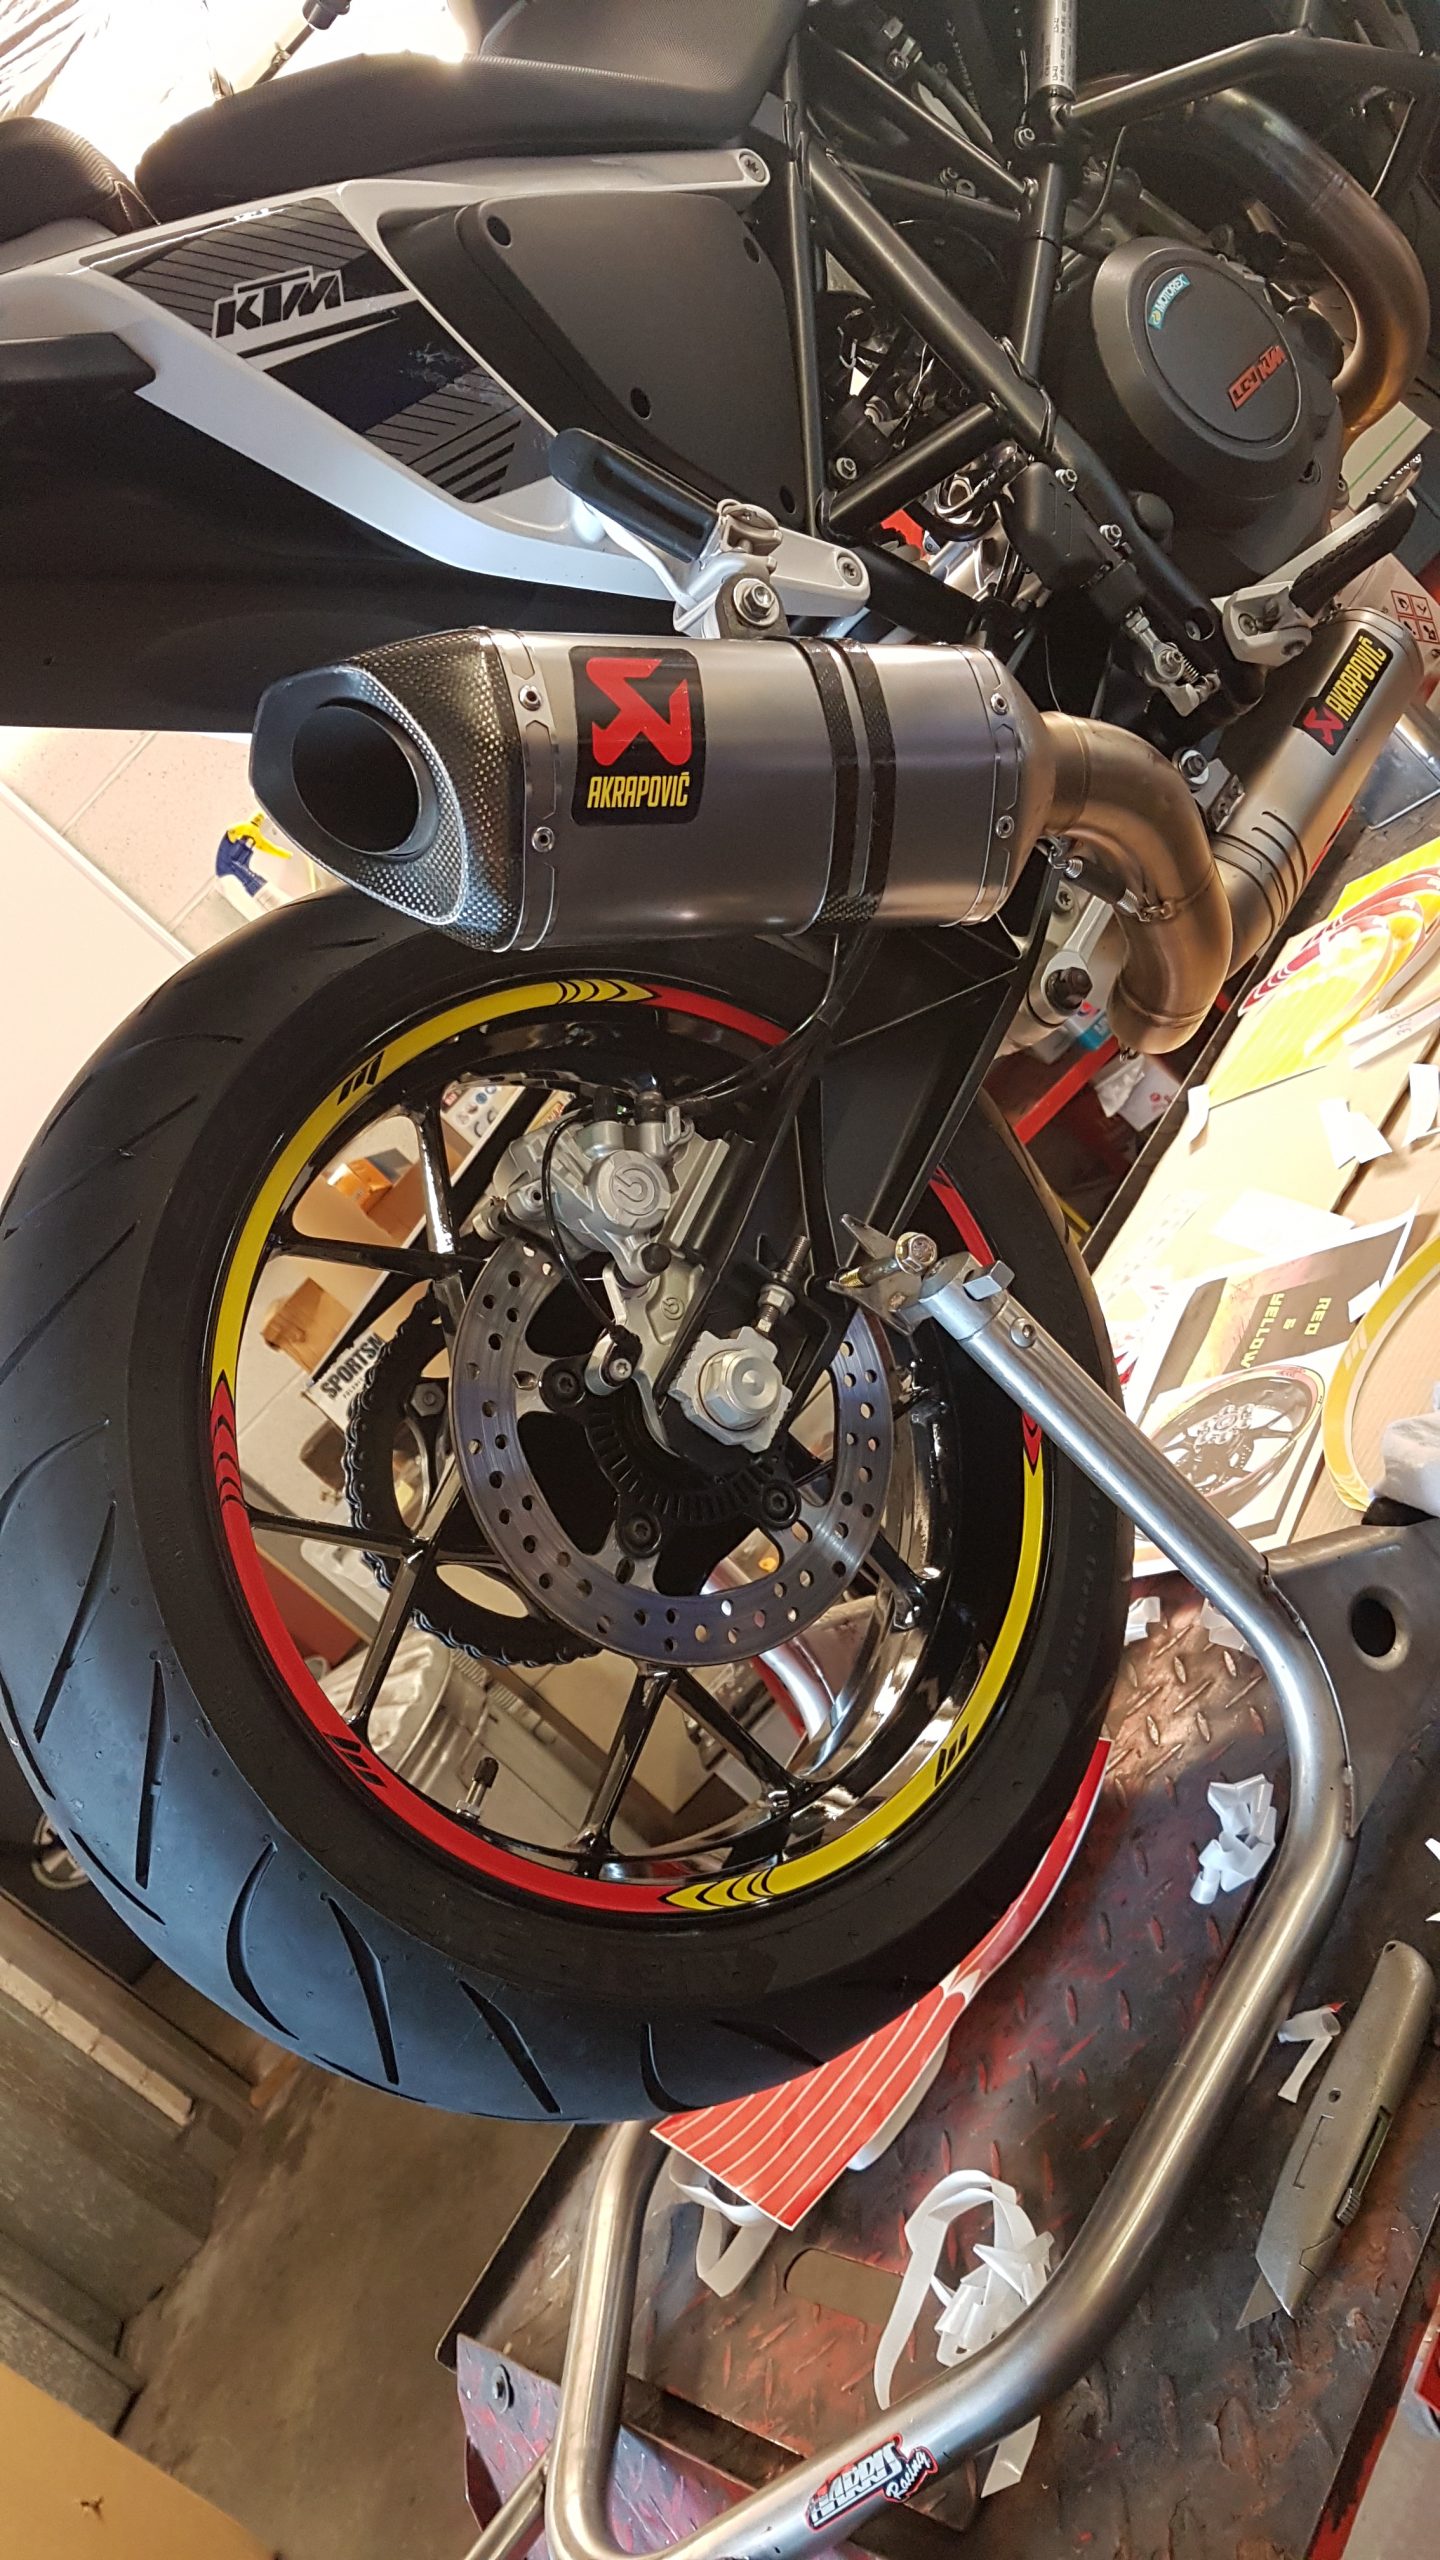
Full Akrapovic Exhaust System/ complete with Akra cat, Akra map and air box
After ordering the parts, it was time to fit them! The process of fitting the exhaust was making me nervous. As someone who’d just bought a brand new bike, seeing it pretty much dismantled made my stomach churn. Thankfully I knew the mechanic so I trusted him to put it back together correctly!
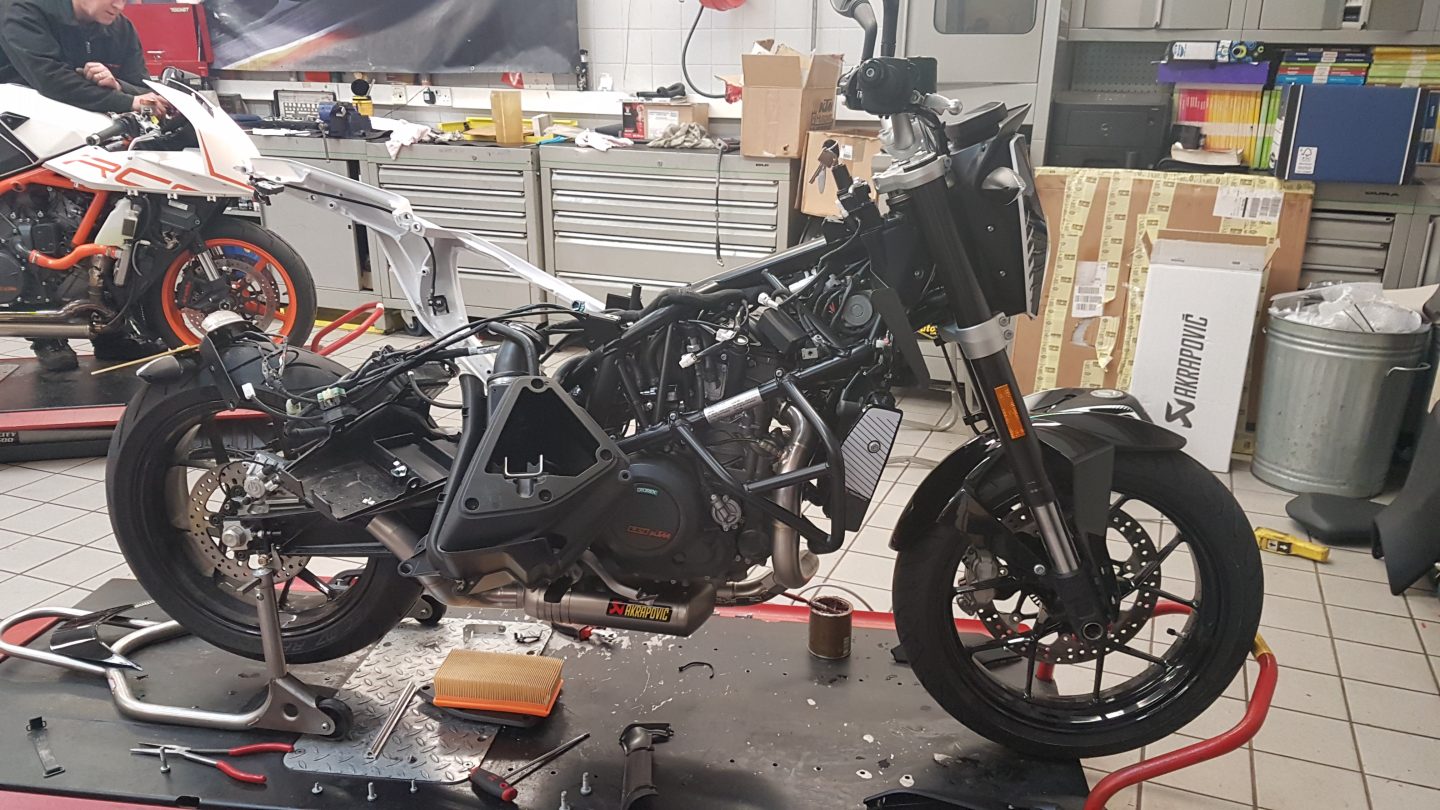
Whilst it was getting taken apart, it turns out my boyfriend http://www.instagram.com/hypermotardmike bought me a graphics kit and some crash bars! So at this stage, we threw everything on.
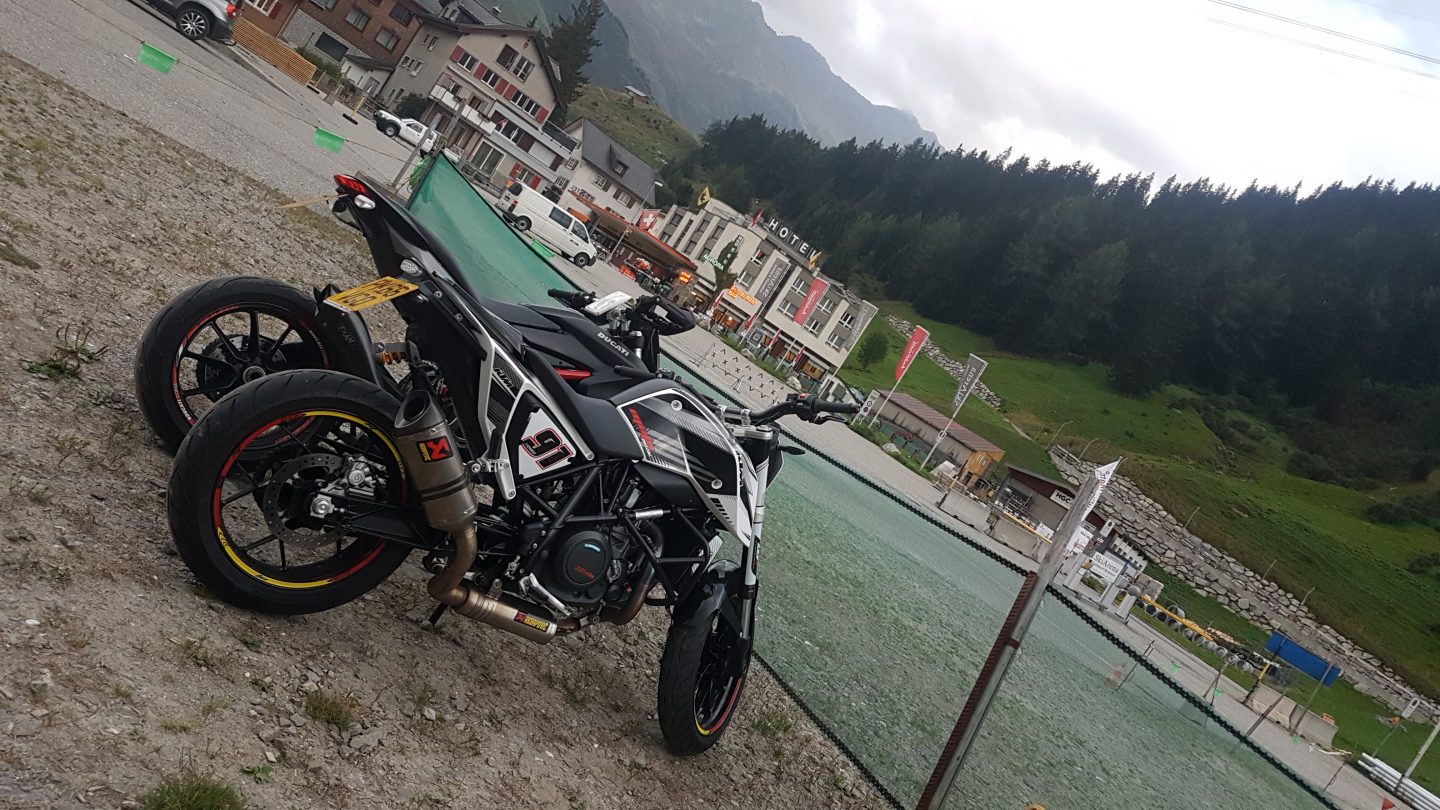
Tail tidy ✓ graphics ✓ new exhaust ✓ crash bars in black ✓ – it was starting to look far better!

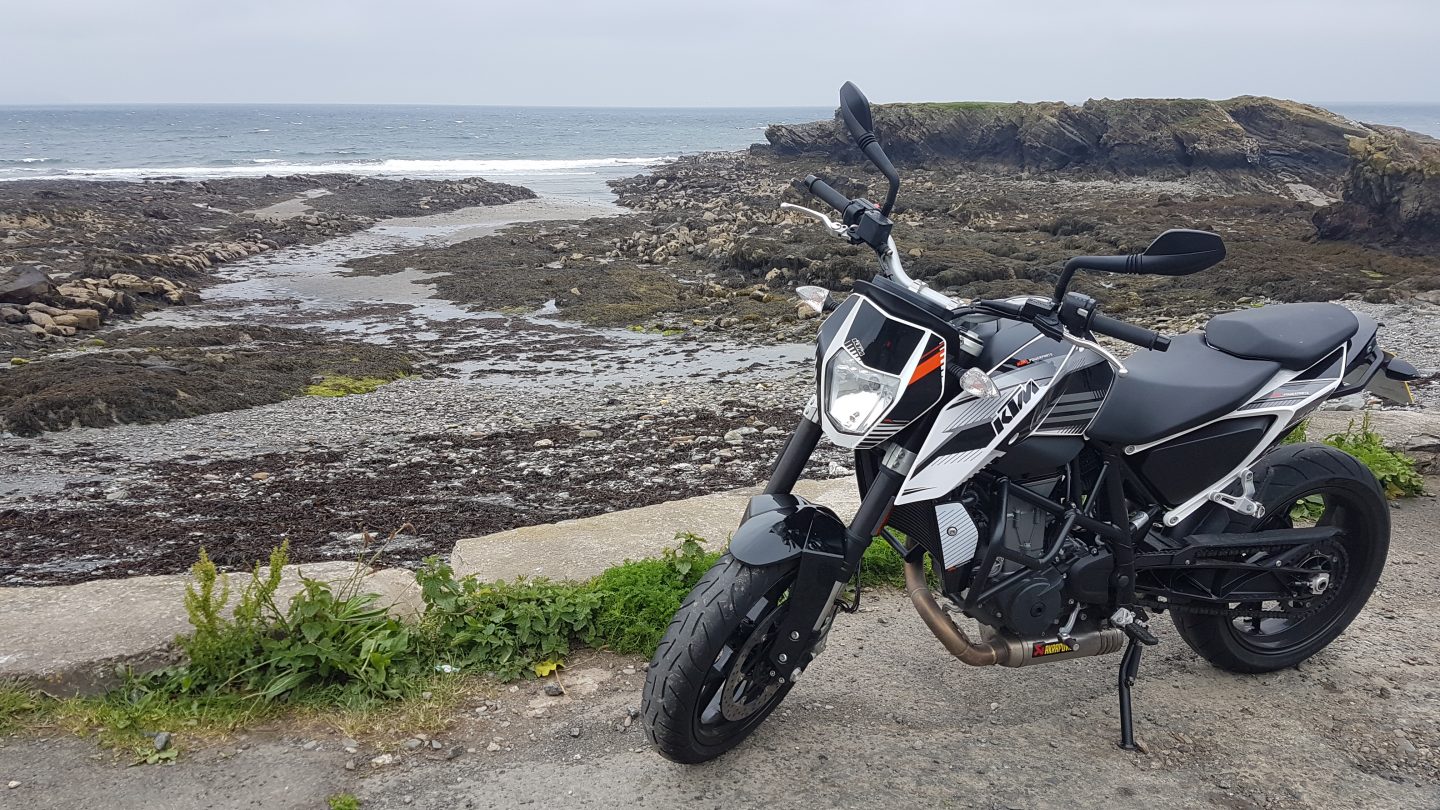
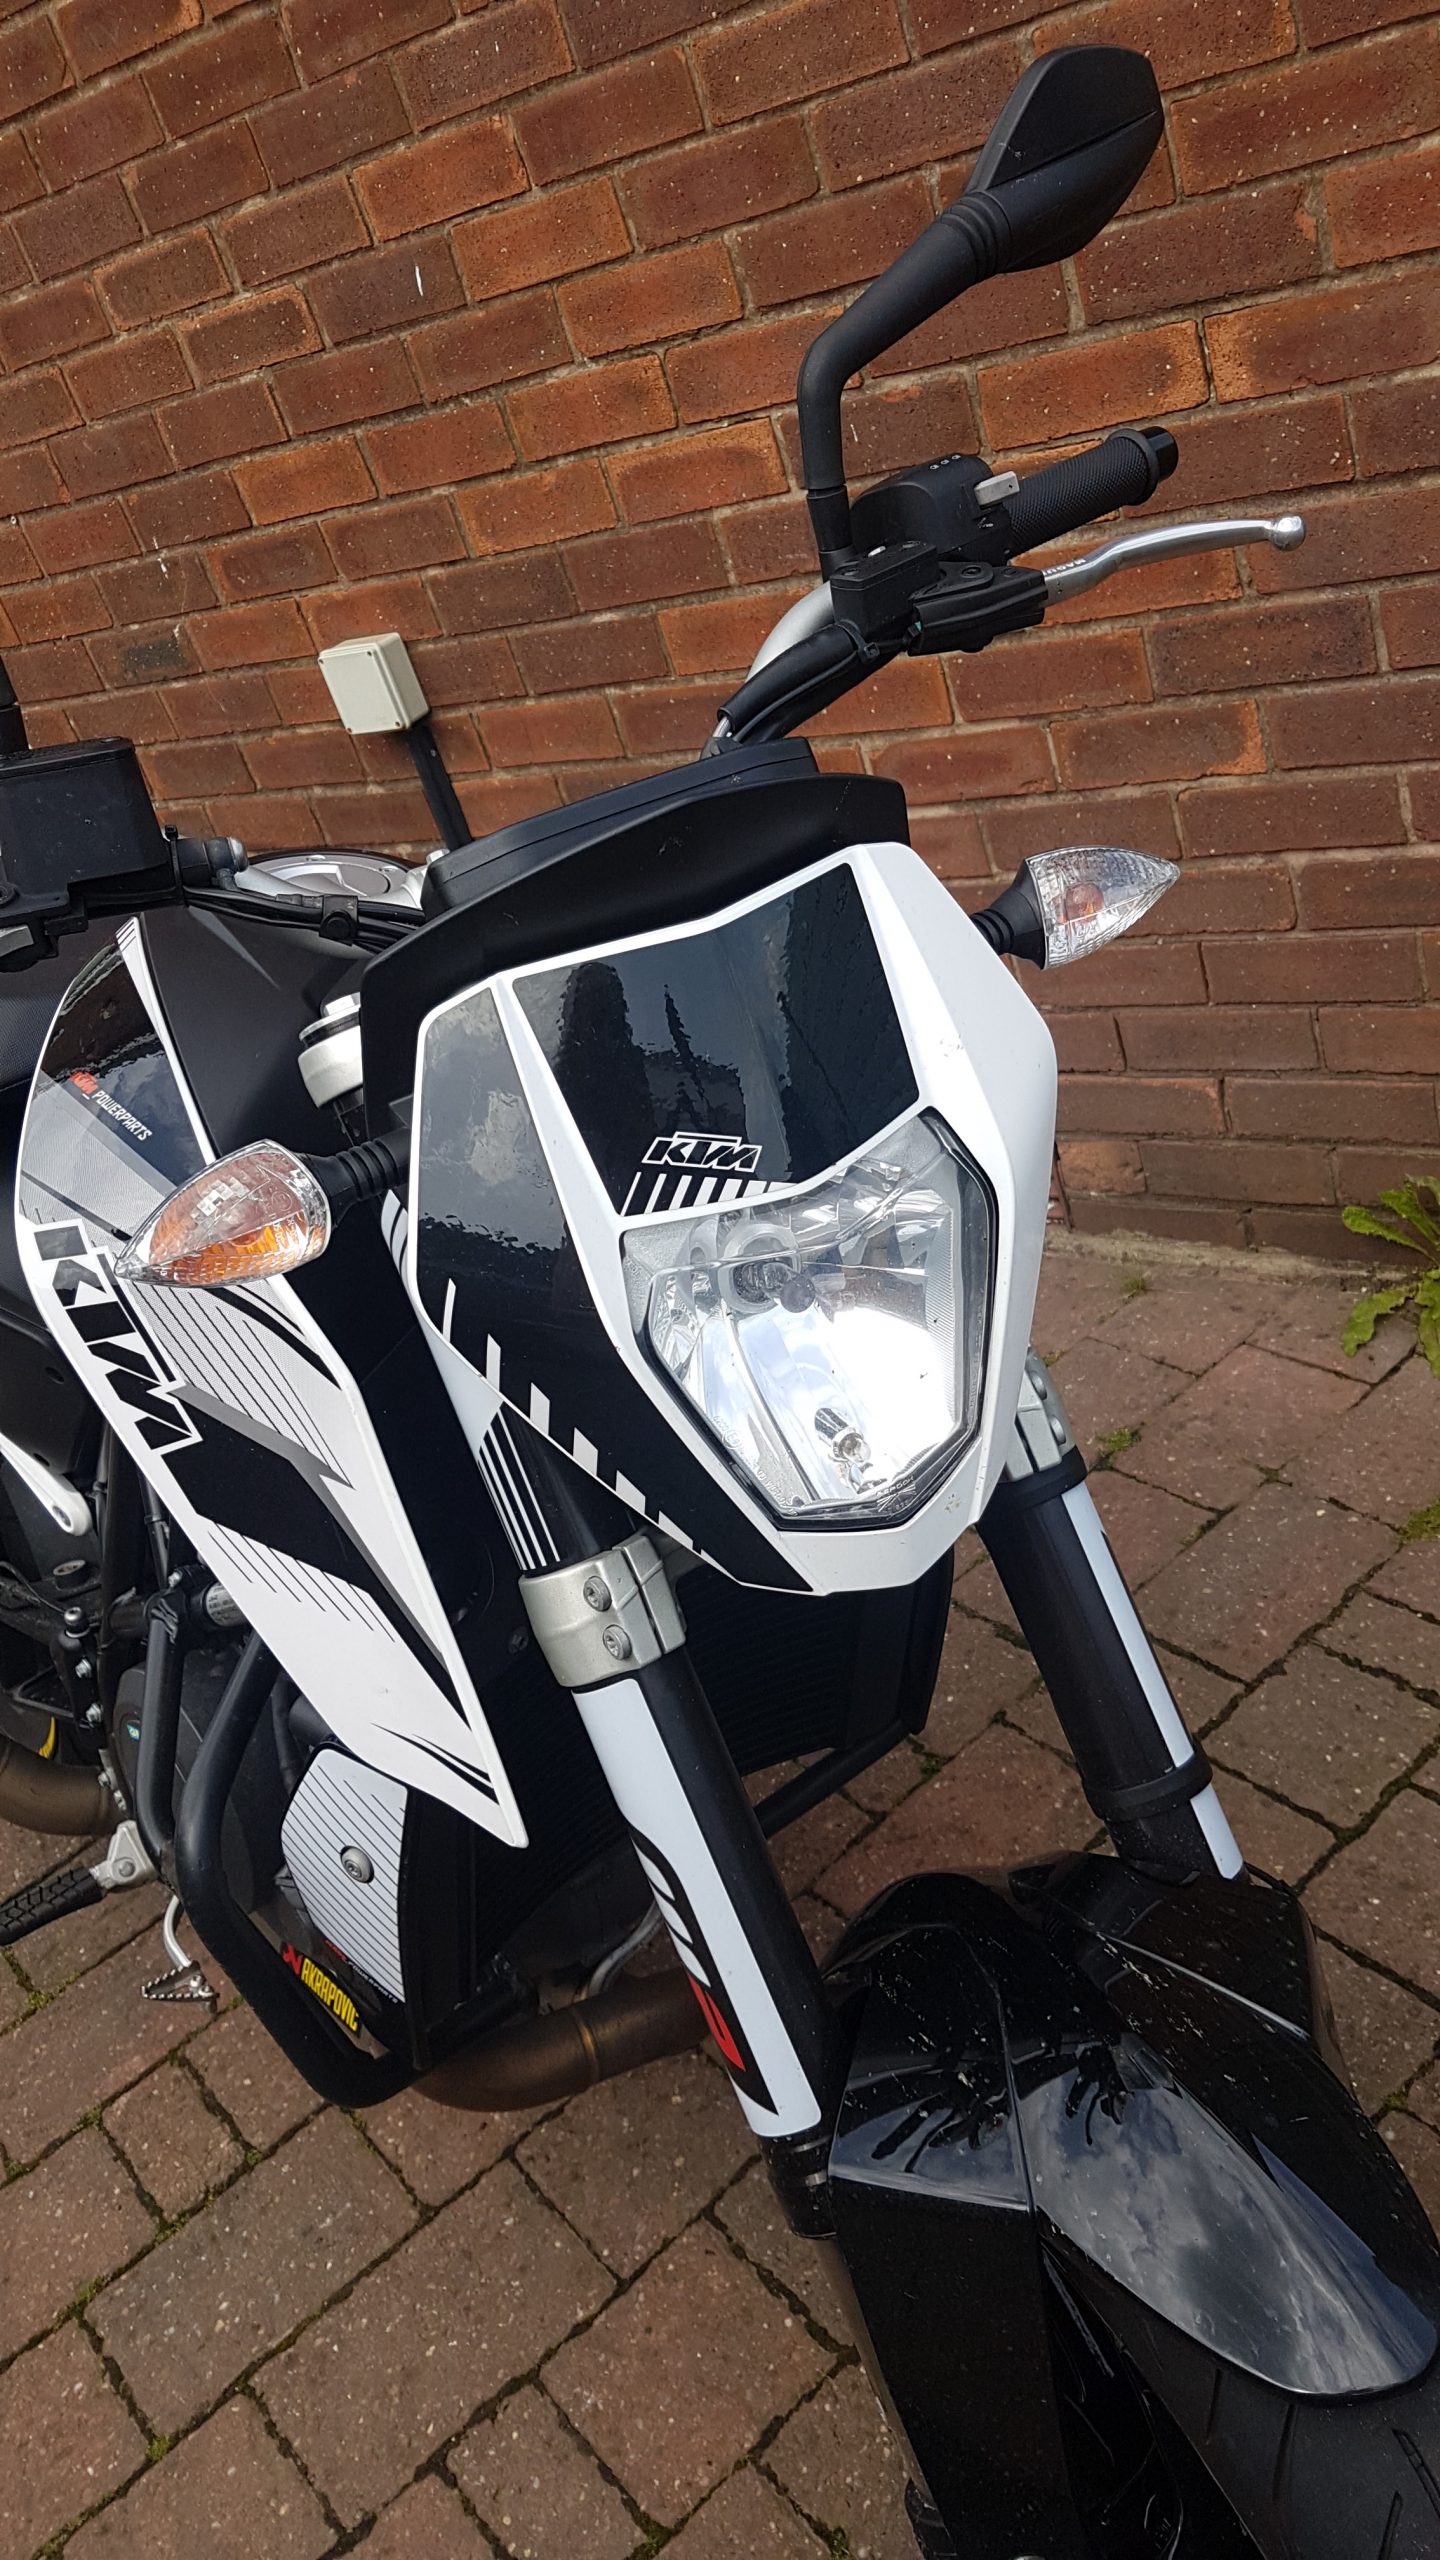
I took the bike to the Isle of Man to watch the 2017 TT with my dad. When taking photos of my bike and looking at it, there was one thing that was really bugging me – the orange stripe on the front!
I wanted to take my KTM away from the usual orange branding and sterotypical look of a KTM. I had removed any 690 graphics and wanted people to wonder what make/ model the bike actually was! I had a head start in completely ridding it of orange with the help of the black frame and white panels – which was a new colour option for 2016! (the previous year’s colour options were black panels/ orange frame or white panels/ orange frame) so I was trying my hardest to steer away from any orange on the bike at all. When I got back to Manchester, I was thinking about ways to cover it, but in the end, I decided just to peel away the graphic panel with it on, I didn’t mind it looking a little unsymmetrical, I wanted it to be quirky after all.
The next part of the make over is where I decided to take a bit of a risk.
I racked my brain for ages about the different colour options I could take my bike down as I liked black and white, but I wanted to inject some colour into it, some fun! After all it is a KTM.
So after pondering back and forth between blue, red and mint green rim tape, I decided at the last minute to pick none of those colours and go for red and yellow!
I was worried it was going to look a little Rupert the bear-ish, but had faith that it would tie in with the existing Akrapovic exhaust stickers!
I wont lie, at first I was a little worried that it looked a bit… dare I say, garish?!
But it kept growing on me and I’m glad I chose something a bit outlandish.
It was starting to get there… but I still wasn’t done!
The graphic kit came with airbox stickers, but I didn’t like them. They looked too retro and it didn’t look right with the bike in my opinion.
I just felt like it was a little bare looking as you can see from this image below:
It is here where I decided to get some custom stickers made for my air box covers.
I used a company called Crispy Designs who have a large presence on instagram.
http://www.crispydesigns.co.uk
https://www.instagram.com/crispydesigns/
Whilst I had ordered my air box cover stickers, I had ordered black bars and smaller indicators. It frustrated me that when the new 2017 duke 125 and 390 dukes were rolling into our showrooms with their updated designs, these bikes came with small indictators and black bars as standard! I just thought it finished off the aesthetics beautifully.
So we began to change them.
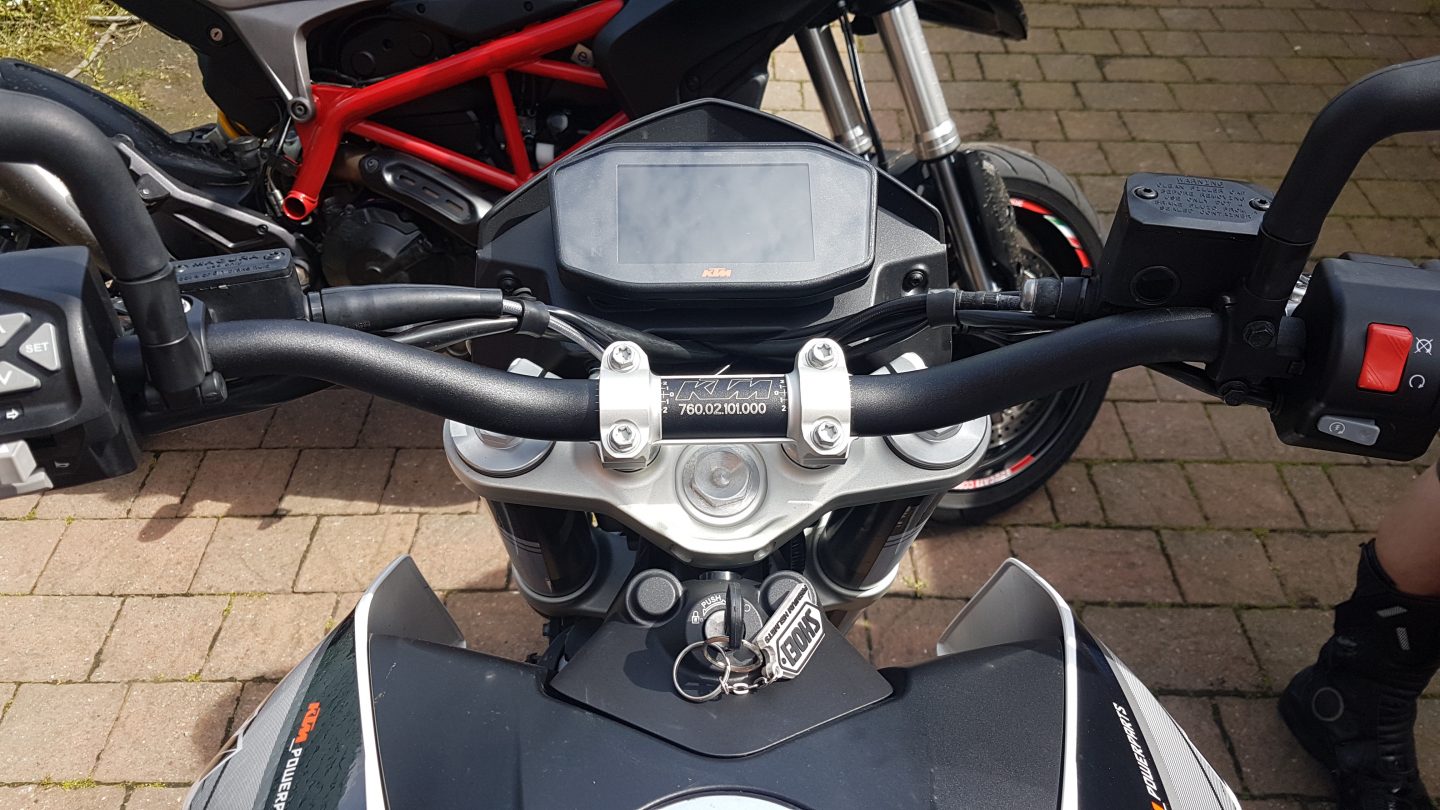
Below silver bars and big, standard indicators
Here, small indicators and silver bars

Here big, standard rear indicators and silver bars
Below, small rear indicators and silver bars
Below, silver bars replaced by black bars – much more stealthy and expensive looking.
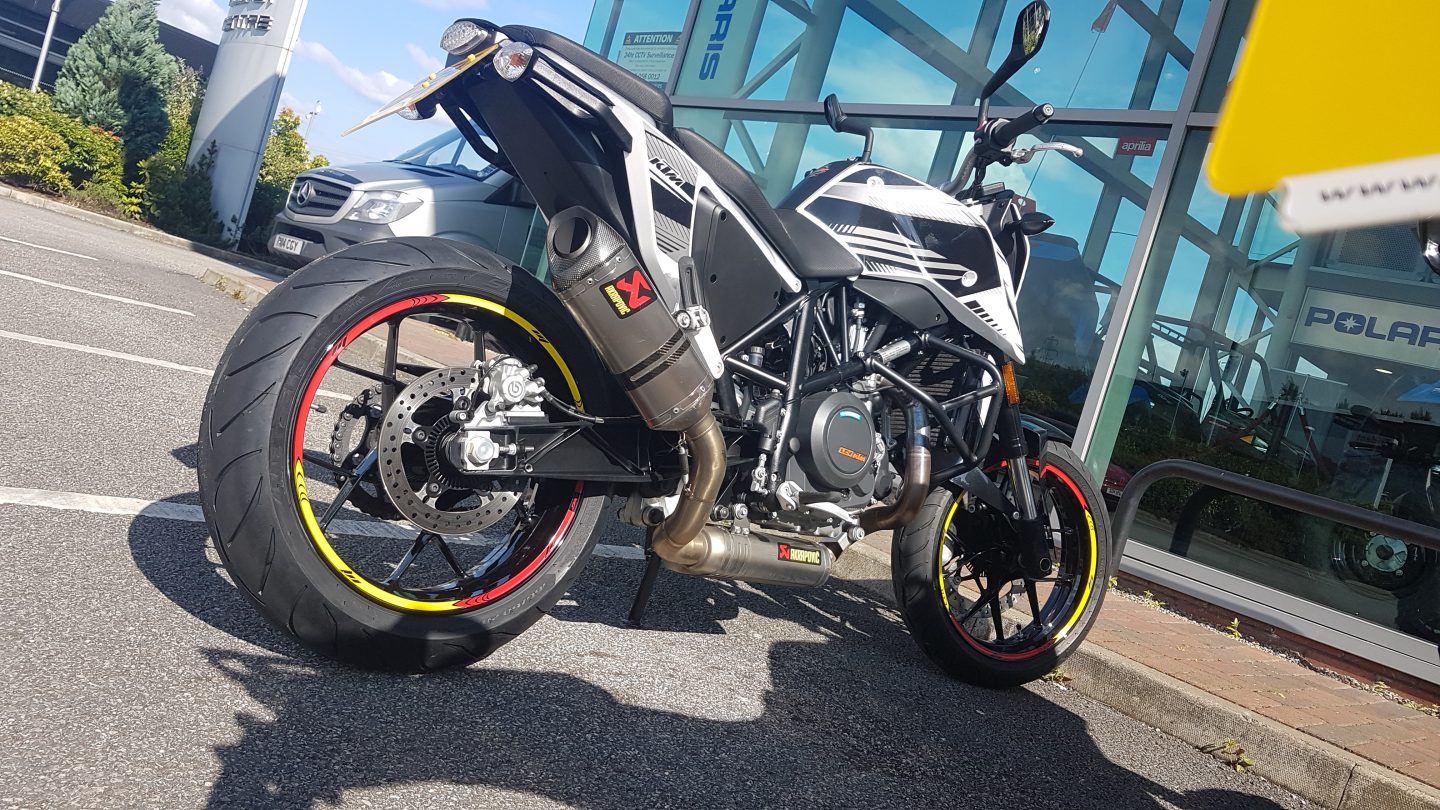
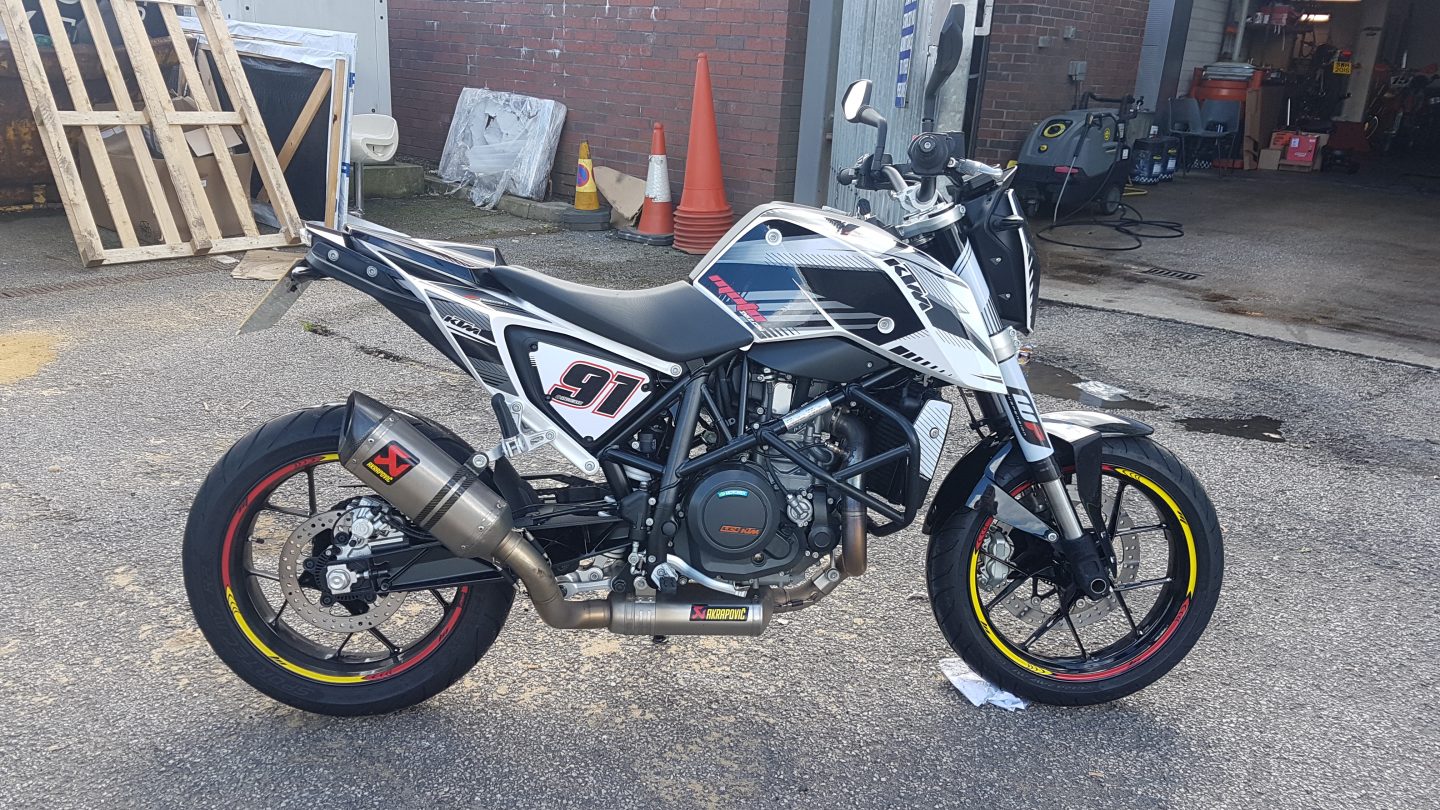
The final touch was a seat cowl complete with matching graphics, black levers and the custom air box cover stickers.
Here is the finished result! I honestly think I am done with it now. I’m not quite sure there is much else I can add to it!
If you have any questions about my bike or the things that have been done to it, please feel free to drop me a comment!
Thanks for reading!